Kielbolzen Teil 3
Natürlich war, mit neuen Kräften, der letzte Bolzen ein Kinderspiel.
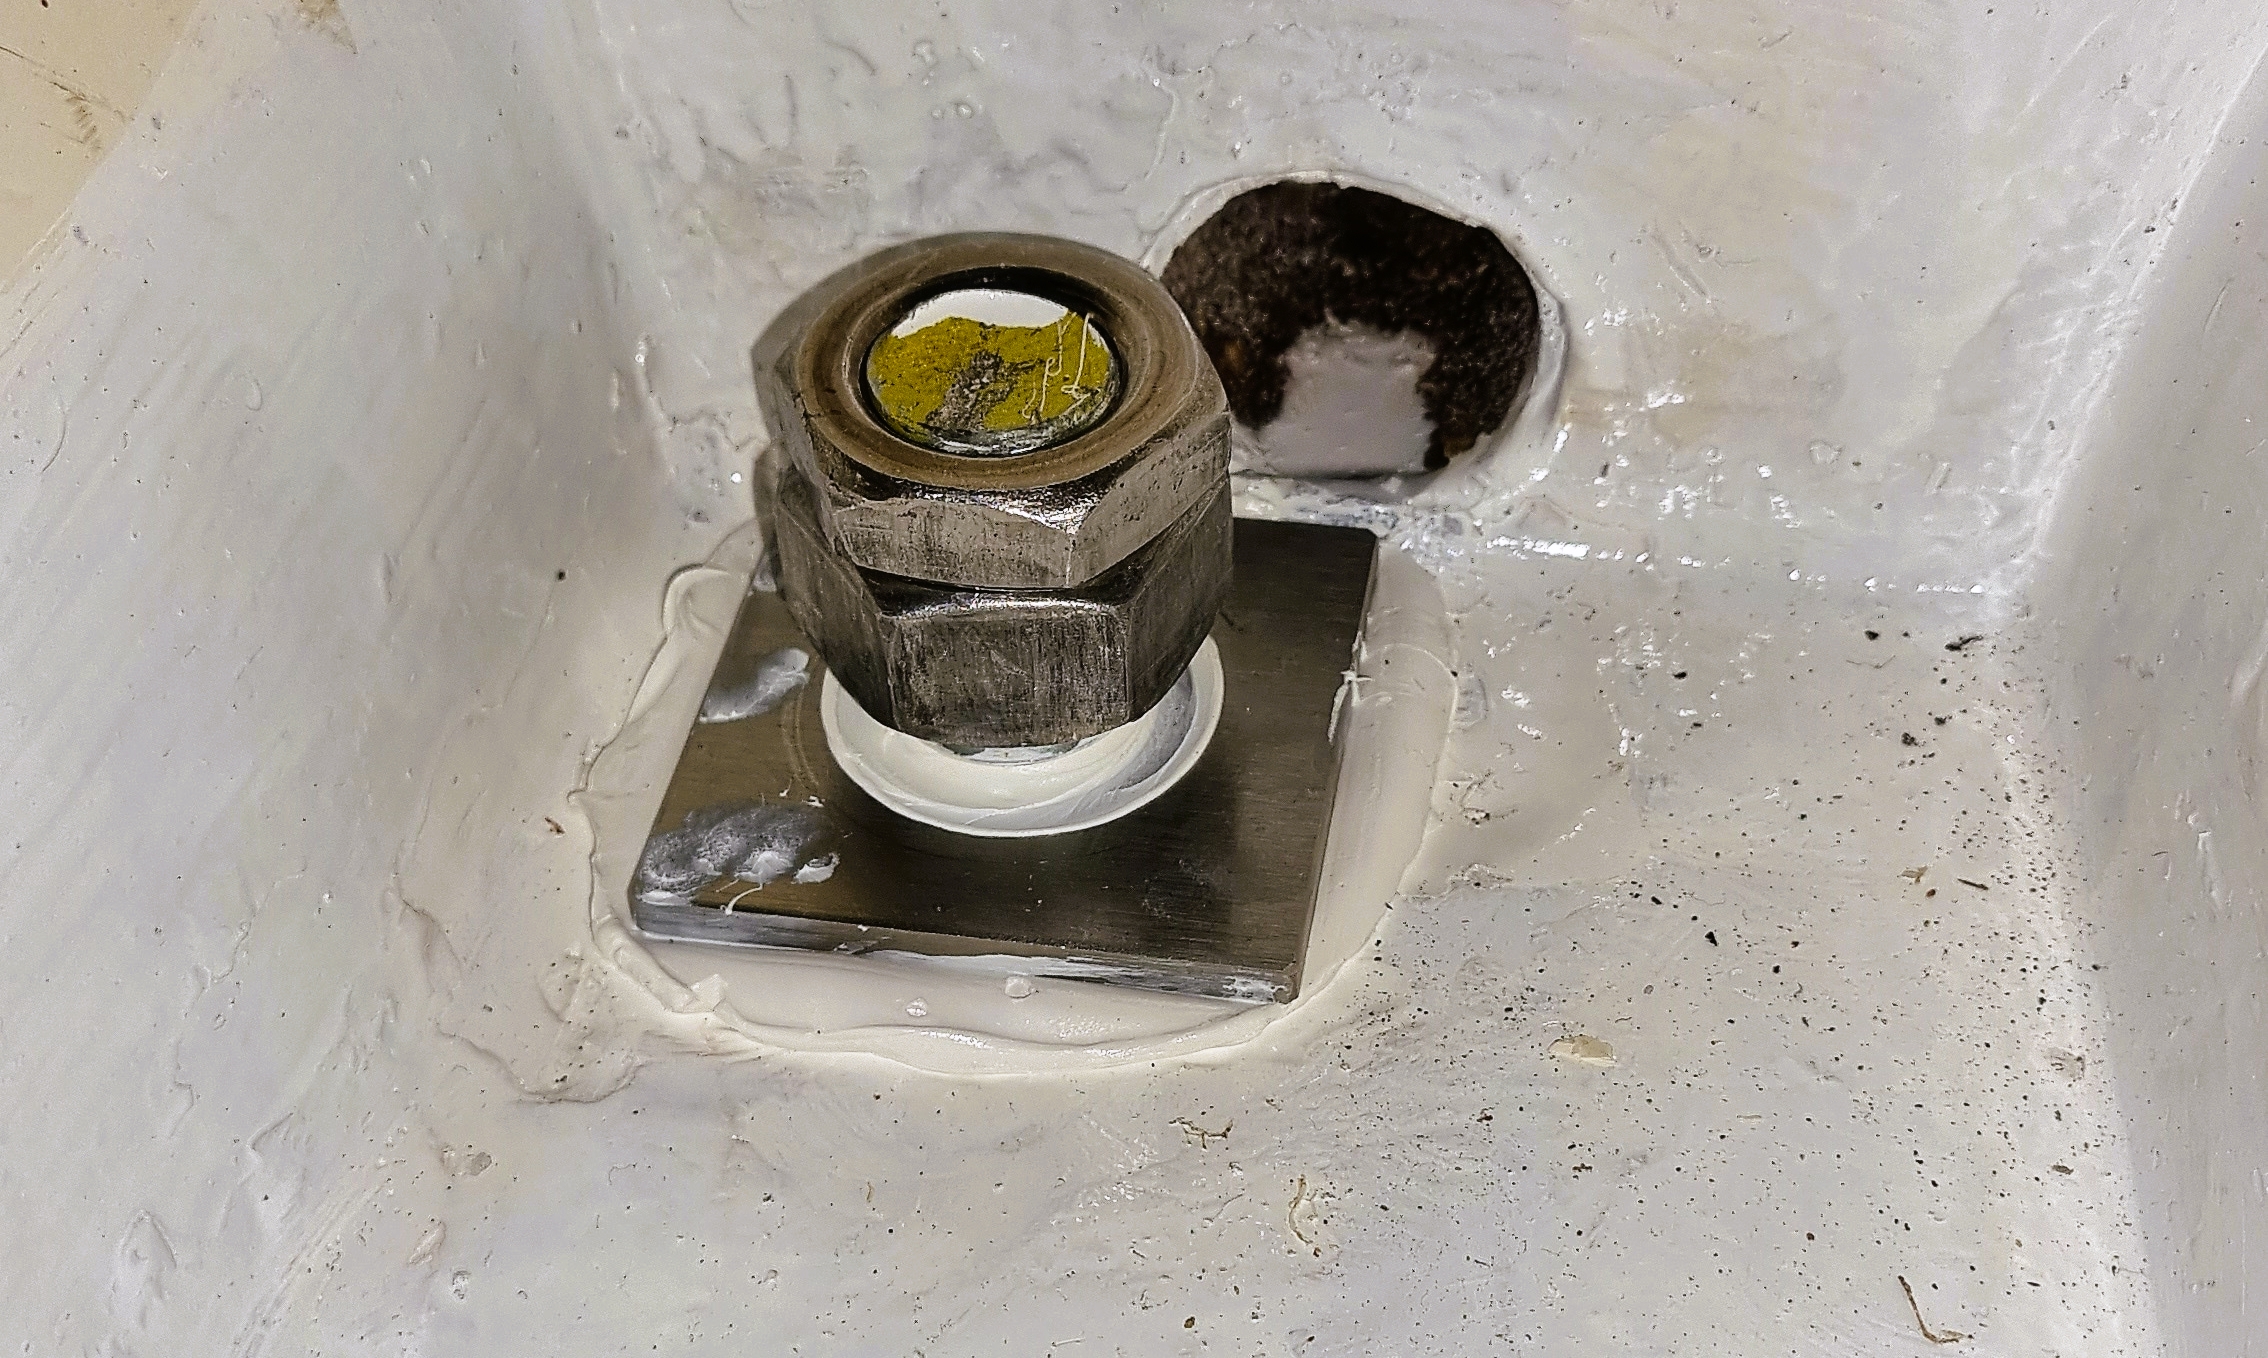
So schnell, wie der alte Bolzen raus war, so schnell war der Neue auch eingeschraubt. Jetzt ging es an die Reinigung der Bilge. Die alten, verrosteten Reste der Unterlegplatten entfernen, alles schleifen und last not least alles mit Bilgenfarbe satt streichen. Gestern dann, eine Woche später, eine der letzten Arbeiten. Neue Unterlegplatten, Muttern und Bolzen entfetten und die Platten mit Sikaflex handfest mit den Muttern anziehen. Das war’s. In zwei, drei Wochen können dann, nach Aushärtung des Klebers, die Muttern endfest mit 275nm angezogen werden.
Insgesamt, inclusive des Zusammenbauens der Bodenbretter und des Tisches, habe ich 4 Arbeitstage – insgesamt 25 Stunden – gebraucht. Ohne Anfahrt.
Abrechnung:
Material: Bolzen incl. Unterlegplatten 100 Euro – Sikaflex 10 Euro – Farbe 20 Euro – diverses Kleinmaterial ca. 20 Euro = insgesamt 150 Euro
Werkzeug neu: Schlagschrauber 40 Euro – SW 35 Nuss lang – SW 32 Mutternausdreher – 1/2 Zoll Verlängerung – Gelenkgriff 1/2 Zoll (gesamt 40 Euro) – Drehmomentschlüssel – 350 nm 65 Euro = insgesamt 150 Euro
Fazit : Mit handwerlichem Geschick ist es eine Arbeit, die man durchaus selbst machen kann, die aber auch nicht immer zu unterschätzen ist. Nachhaltiger wäre es sicherlich gewesen, mit den Arbeiten die Werft zu beauftragen (allein 4 Anfahrten a‘ 600 km/Hin- und Rückfahrt). Der Schlagschrauber (Qualitätswerkzeug von Lidl) wäre nicht zwingend notwendig gewesen, war aber zum Lockern der Muttern auf den Unterlegplatten schon hilfreich und hat seinen Dienst getan. Eines der bisher noch nicht erwähnten Werkzeuge, ein 1,5 m langes Rohr zur Verlängerung des Gelenkgriffes, stellte sich als eins der wichtigsten Utensilien heraus.
Die Kostenschätzung der Werft lag bei ca. 2.500 Euro aufwärts, wobei man sich verständlicherweise auch nicht festlegen wollte, was aber bei 25 Stunden durchaus realistisch gewesen wäre. Auch Aussagen im Chat der MOA (Moody Owners Assoziation) liegen bei Werftkosten in England bei ca. 3.000 Pfund.
Ich hoffe, wir geben allen Moody Besitzer/innen, die dasselbe Problem haben (schließlich sind alle älteren Modelle irgendwann davon betroffen), hiermit auch eine Anleitung, wie der Austausch der Muttern funktioniert. Letztendlich sind es tatsächlich nur die Muttern und nicht die Bolzen, die betroffen sind. So hätten unsere Muttern auch noch einige Jährchen gehalten, aber der Gedanke, nicht zu wissen, wie die Bolzen (die komplett in Ordnung waren) aussehen, ließ uns nicht mehr ruhig schlafen.
[unitegallery Kielbolzen3]
Keelbolts Part 3
Of course, with new powers, the last bolt was a piece of cake. As quickly as it was out, the new one was screwed in. Now it was time to clean the bilge. Remove the old, rusty remains of the shims, sand everything and last but not least paint everything with bilge paint. Yesterday, a week later, one of the last jobs. New shims, degrease nuts and bolts, and hand-tighten the shims to the nuts with Sikafflex. That’s it. In two or three weeks, after the adhesive has cured, the nuts can be tightened to 275nm.
In total, including the assembly of the floor boards and the table, it took me 4 working days – a total of 25 hours. Without the journey.
Settlement :
-Material: Bolts incl. shims 100 Euro – Sikaflex 10 Euro – paint 20 Euro – miscellaneous small material approx. 20 Euro. Total 150 Euro
New Tools : impact driver 40 Euro – SW 35 nut long – SW 32 nut extractor – 1/2 inch extension – joint handle 1/2 inch – total : 40 Euro Torque spanner – 350 nm 65 Euro total 150 Euro
Conclusion: With manual skill, it is a job that you can certainly do yourself, but it should not always be underestimated. It would certainly have been more sustainable to commission the shipyard with the work (4 journeys of 600 km alone). The impact wrench (quality tool from Lidl) would not have been absolutely necessary, but it was helpful for loosening the nuts on the shims and did its job. One of the tools not yet mentioned, a 1.5 m long tube to extend the joint handle, turned out to be one of the most important utensils.
The shipyard’s cost estimate was around 2,500 euros upwards, although they understandably didn’t want to commit themselves either, which would have been quite realistic at 25 hours. Statements in the MOA (Moody Owners Association) chat also put shipyard costs in England at around £3,000.
I hope we are giving all Moody owners who have the same problem – after all, all older models are affected at some point – some guidance on how to replace the nuts. In the end, it is really only the nuts and not the bolts that are affected. Our nuts would have lasted for a few more years, but the thought of not knowing what the bolts (which were completely fine) looked like made us lose sleep.
